How to install a Smart Bro 3G USB modem on Ubuntu 12.04
I’m currently in the Philippines and staying at my grandpa’s place to spend Christmas and New Year. He doesn’t have internet here so the first thing I did when I arrived was to look for a 3G USB Modem.
I went to the closest shopping mall and saw a Smart store (one of the carriers here) and asked for one. It costs P995 (around $25) and comes with 5 days unlimited use.
The USB device contains a software set to auto-run once plugged in but only works on Windows and Mac OS. It really annoys me when companies ignore us Linux users. Fortunately, the guys maintaining Ubuntu made it easy to get most USB modems working without installing any additional software.
Here are the steps:
Note on detecting the USB modem: I’m not sure whether this applies to just my computer (Dell XPS 13) or all running Ubuntu 12.04. In my case, for the USB device to get recognized as a modem, I had to “eject” it as Ubuntu found it first as a removable storage device. It was detected as a modem after that.
1. In the Network Connections manager, go to the Mobile Broadband tab and click the Add button.

2. Select your modem device and click Continue.

3. Select Philippines as the country/region.
4. Select as Smart as the Internet provider.

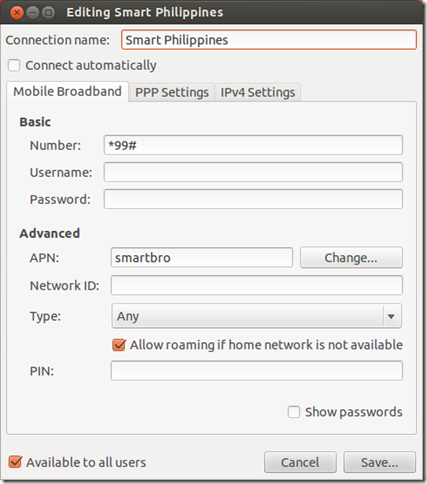
5. Choose My plan is not listed… under Select your plan, then enter smartbro as the APN (I tested the Default option as well which uses ‘internet’ as the APN and that actually worked also, but I read online that the APN should be ‘smartbro’).

6. Give it a Connection name, hit Save, and you can now select this connection to connect to the Internet using your USB modem.
Tags: mobile, howto, tech, networking