How to connect to your Netgear WGPS606 print server on Windows Vista or Windows 7
In Windows XP connecting to the Netgear WGPS606 wireless printer server is pretty simple, you connect to it the same way you connect to a Windows print server, using the UNC path (i.e. \\print_server_name_or_ip). In Windows Vista or Windows 7, however, this won’t work.
I actually first ran into this problem about a year ago when I upgraded to Windows Vista. I then did a fresh install of Windows 7 a few months ago and I finally had to actually print something over the weekend (tickets) and completely forgot how I did it the first time. So after a few minutes of searching around I found the guide I used last time: http://help.lockergnome.com/vista/Netgear-Server-Vista–ftopict17927.html
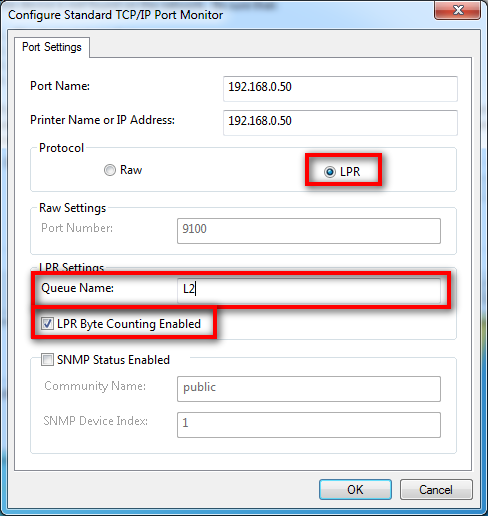
I missed an important step while I was reading the instructions from this site this time and I was going crazy trying to figure it out for quite a while (I forgot to check the “LPR Byte Counting Enabled” option, causing my print jobs to not fully complete, it will print about 2/3 of the page then stops). So I decided to put together this step-by-step instructions here with pictures as I’m sure I’ll have to do this again at some point and some people probably ran into the same issue.
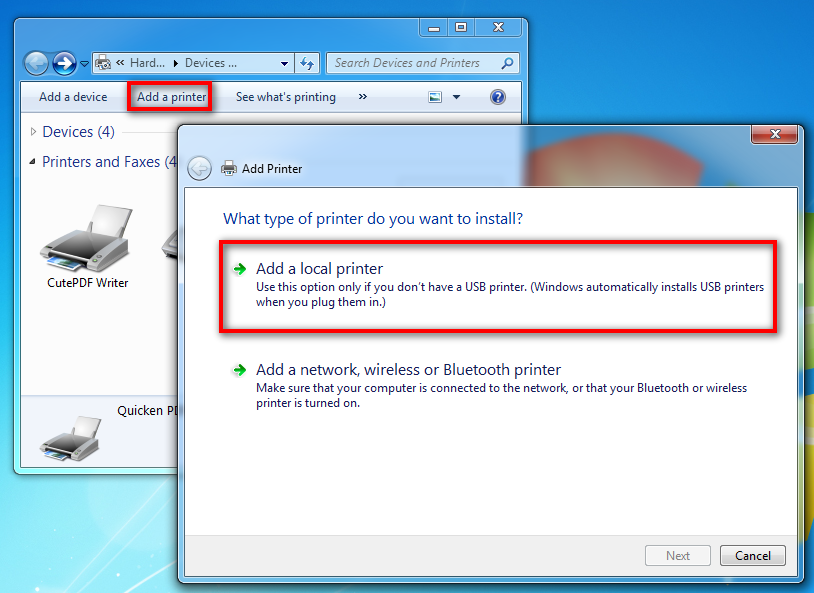
Step 1 – Click the Windows icon on the taskbar and select “Devices and Printers.” Click on the “Add a printer”button, then click “Add a local printer.”
Step 2 – Select “Create a new port” then select “Standard TCP/IP Port.”
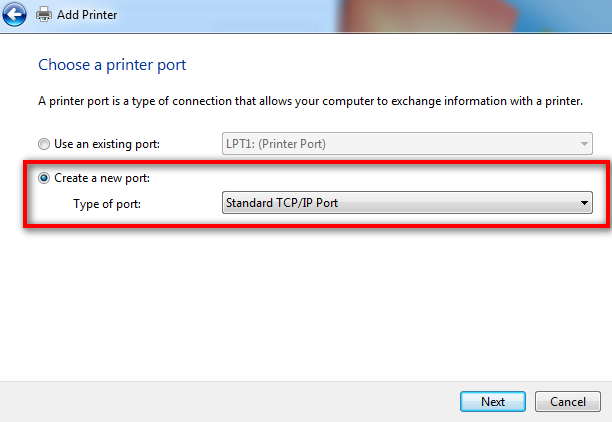
Step 3 – Enter the IP Address of your print server in the “Hostname or IP Address:” field.

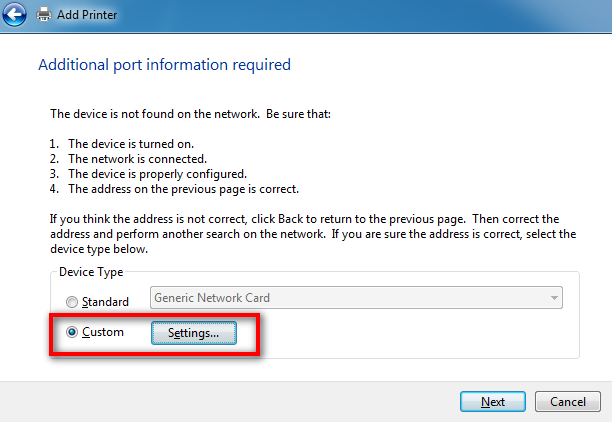
Step 4 – Select “Custom” then click the “Settings…” button.
Step 5 – Select “LPR,” Enter L1 or L2 (depending on which USB port you have your printer plugged in to on the print server, if you have it plugged in to USB1 then enter L1, otherwise enter L2) in the “Queue Name:” field. Check the “LPR Byte Counting enabled” check box (this is important!).
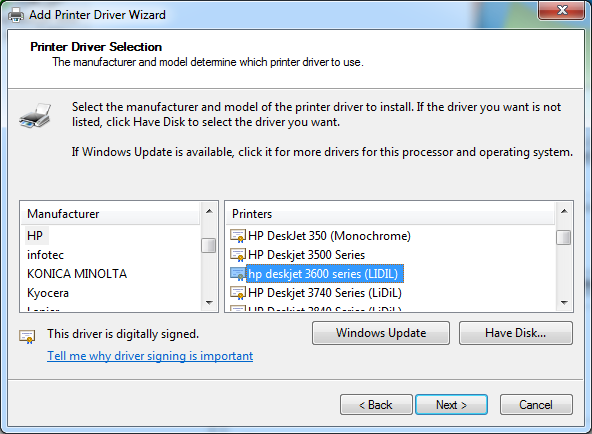
Step 6 – Select your printer manufacturer and model. If you don’t see your printer model in the list, click the“Windows Update” button to search for additional drivers. If you still don’t see it, go to your printer manufacturer’s website and download and extract the driver files, click the “Have Disk…” button, and select the .inf file from the extracted driver files. In my case (I have an HP DeskJet 3650), HP doesn’t provide the drivers on their website and suggested to use Windows Update, so that’s what I did and drivers seem fine.
Step 7 – Keep clicking next and print a test page. That’s it! You’re all set!